
This post is part of an ongoing review of the Fujifilm X-T2 and its accompanying ecosystem. They are meant to be read in order. Contents will be updated as I think of new experiences to share.
- Bird Photography
- Safari Wildlife Photography (this post)
- Travel Photography (coming soon)
- Portrait Photography (coming soon)
- Tips and Tricks (coming soon)
- Fujinon XF100-400mm Review
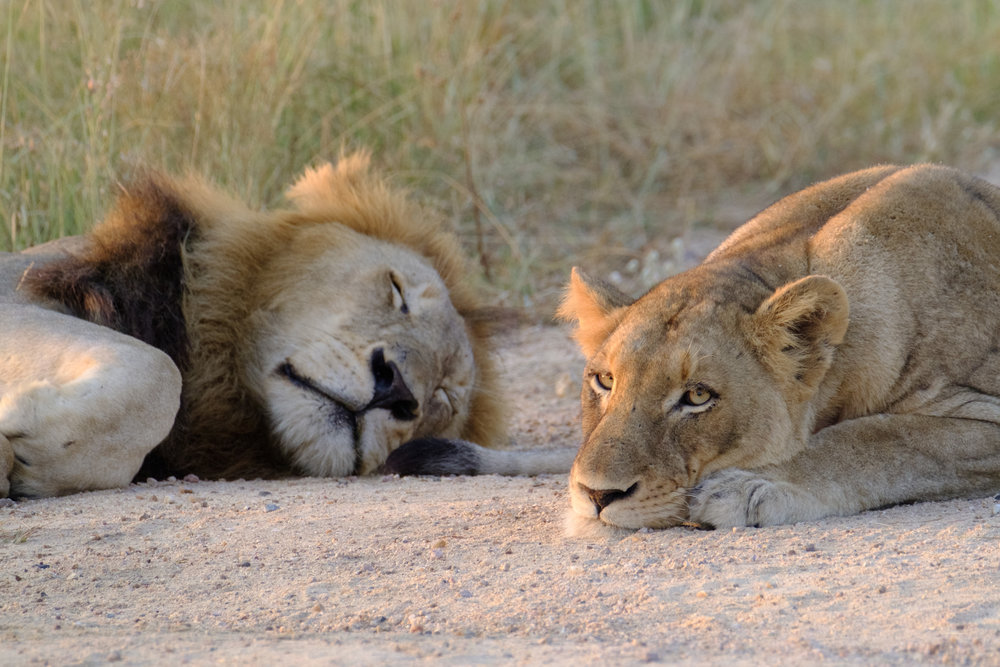
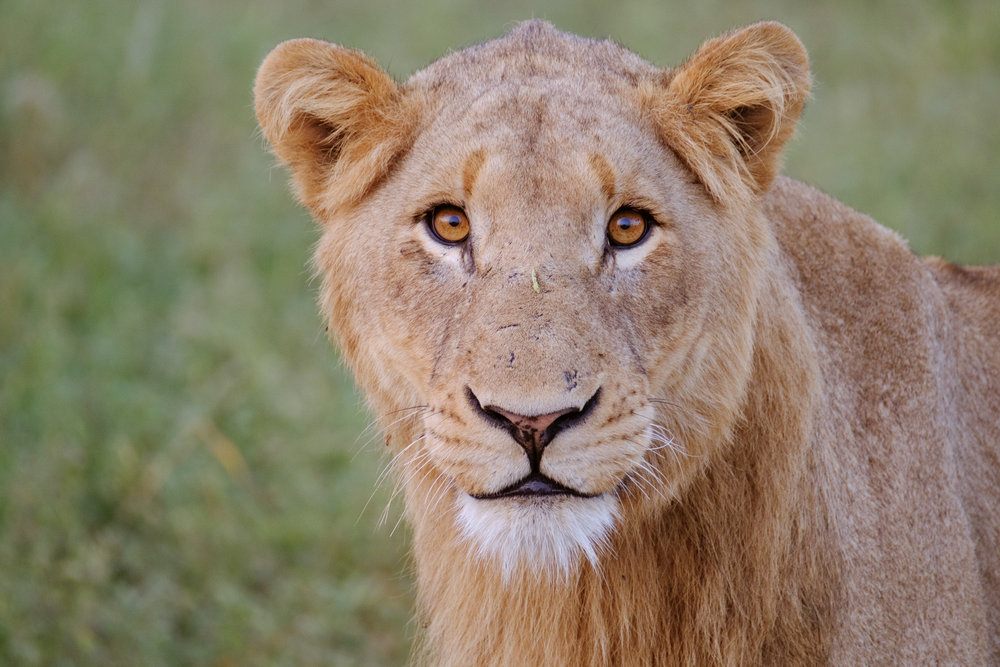
Lions in between mating sessions – XF 100-400mm with 1.4x TC, F5.4, ISO 3200
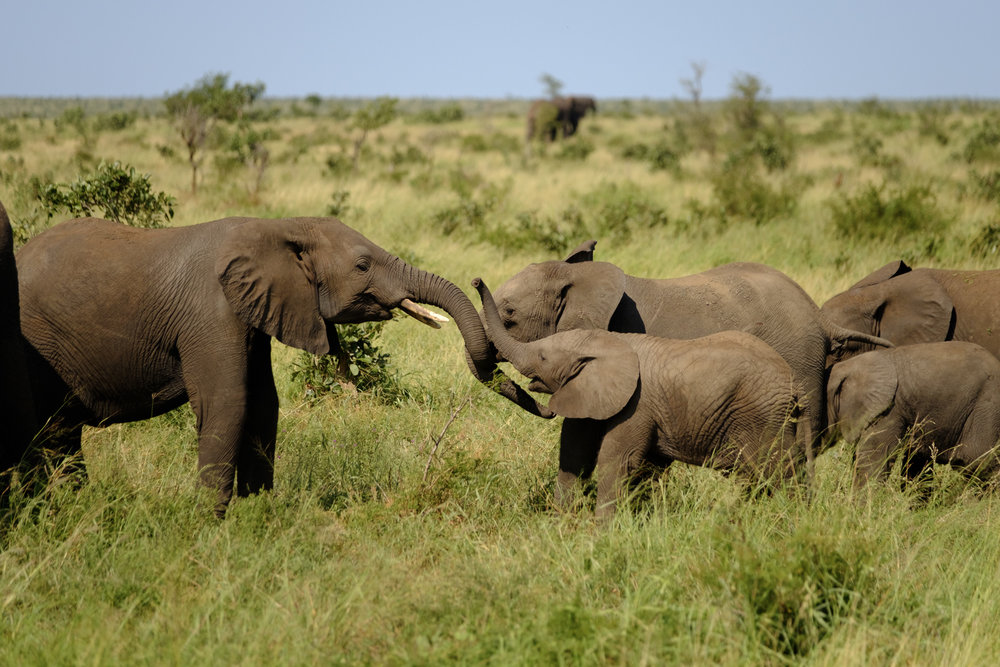
Elephants when they’re not threatening to charge – XF 50-140mm, F2.8
I wasn’t always interested in Wildlife Photography. Taking photos of animals trapped in cages or enclosures in a zoo – not my thing. Things changed when I was living in Johannesburg for work in back in 2015.
There is no substitute for the thrill of searching for a pride of mating lions before sunrise, randomly encountering a cheetah mom teaching her cub how to hunt downwind, and then having an African Elephant threaten to charge the already huge 4×4 you’re in – all while trying to capture them in good light.
Back to the trip, I brought my fiancée, Adrianna to South Africa to surprise her with a proposal, which was followed by a 5 day photo safari in the Kruger National Park.
If you haven’t read Part 1 of the review, please take some time to as this will mainly be a continuation.
The Equipment
I brought the same two X-T2s that I used in Japan to the Kruger, one had the XF 100-400mm with the XF 1.4x TC permanently attached to it and the other had the XF 50-140mm permanently attached to it. This gave me not only a solid 35mm equivalent coverage from 75mm to 840mm, but also a fast F2.8 for close encounters in low light.
Up close and personal with the XF 100-400mm and 1.4x TC – 560mm, F8, 1/25s
The important benefits of having more than one body go beyond preventing a missed shot. You’re often driving into fine dust when driving on dirt roads, so you do not want to be changing lenses in this environment. The X-T10 that Adrianna used with a XF 16-55mm now makes a scraping sound whenever the shutter is released, presumably due to dust getting trapped in the focal plane mechanism.
I also brought a an Olympus Dot Sight EE-1 for tracking wildlife in motion and birds in flight without using the viewfinder. This was extremely helpful during my last trip, when I had to deal with the atrocious blackout times in the Olympus E-M5 II. To my surprise, I ended up not using it at all this time, which just goes to show how impressively low the blackout times are on the X-T2 for a mirrorless camera.
Autofocus
It’s important to note that I spent 3 of the 5 days with firmware 1.10, and did a field upgrade to version 2.00 on the 4th day.
Acquisition Frustrates At Times, but Still Pretty Accurate
I had my camera set to Focus Priority instead of the default Release Priority. This means that the camera will not release if it thinks it hasn’t locked on focus. With firmware 1.10, I’ve encountered several situations tracking leopards where the camera outright refused to snap because it thought it had not attained focus. Even though this was a tricky frame which had the leopard moving in and out of very thick bushes, I was pretty sure that the camera had attained focus through the viewfinder, but simply refused to take the shot. I ended up having to mash the AF-On button until the focus boxes lit up green. By this point, my companions must have already fired off about 30 – 40 frames.

Leopard through the bushes – XF 100-400mm with 1.4x TC at 560mm, F8
I think the issue is that the Focus Priority algorithm is too aggressive in confirming that focus has been attained. Anecdotally, I felt this was somewhat alleviated with version 2.00 but had no empirical way to test it. I hope Fujifilm adds a third “balanced” option between Release Priority and Focus Priority sometime in a future firmware release.
In terms of tracking accuracy though, the camera is still as sharp as ever and very dependable. If the X-T2 indicates that it’s in focus, then it’s almost definitely in focus.
Tracking Still Largely Excellent, with Some Caveats
As mentioned in part 1 of the review, tracking is still excellently reliable once the camera has acquired the subject, especially since the subjects tend to be on the larger side. With AF-C set to Mode 2, tracking Leopards that moved in and out of bushes was never a problem once they have been acquired. One limiting factor I found was the restriction of phase detect focus points to the centre when shooting at 11fps. This made it challenging to track subjects that frequently got out of the centre zone of the frame, like the charging Wildebeest below. What it means is that you have to be proactive with releasing AF-on and trying to reacquire focus whenever your subject escapes the centre zone. My guide, who was using a D500 had an easier time as that camera has focus points that extend horizontally across the frame.
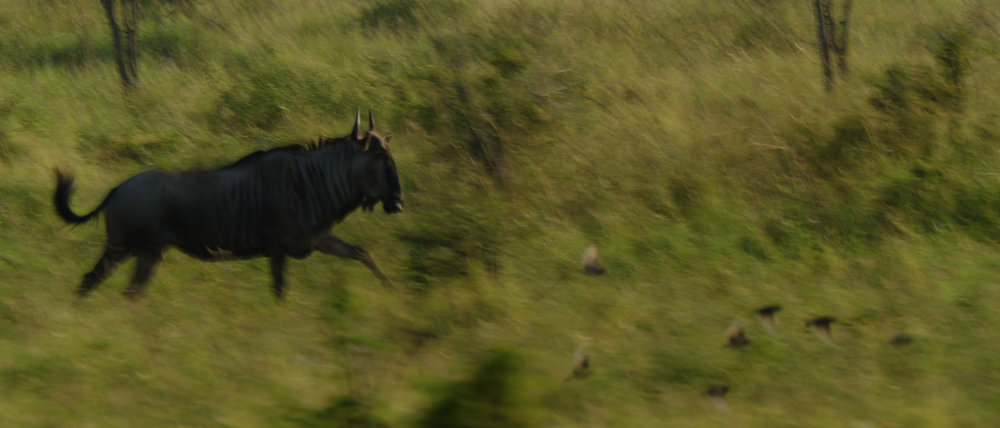
This charging Wildebeest was difficult to track with the centre AF points as it kept moving towards the left edge of the frame.
I guess we’ll have to wait for the “Ultimate X-camera” that’s supposed to launch with the prime telephoto for expanded AF coverage.
Firmware 1.10 vs Firmware 2.00
I was pretty excited when Firmware 2.00 was announced and while I didn’t get to shoot with it from Day 1 of the safari. On Day 4, I managed to get enough of a 3G signal to tether my MacBook Pro and download the 50MB file onto an SD card during a toilet break(fn) at Paul Kruger Gate.
Firmware 2.00 brings many benefits, but here are the ones that did the most for me in the context of wildlife photography:

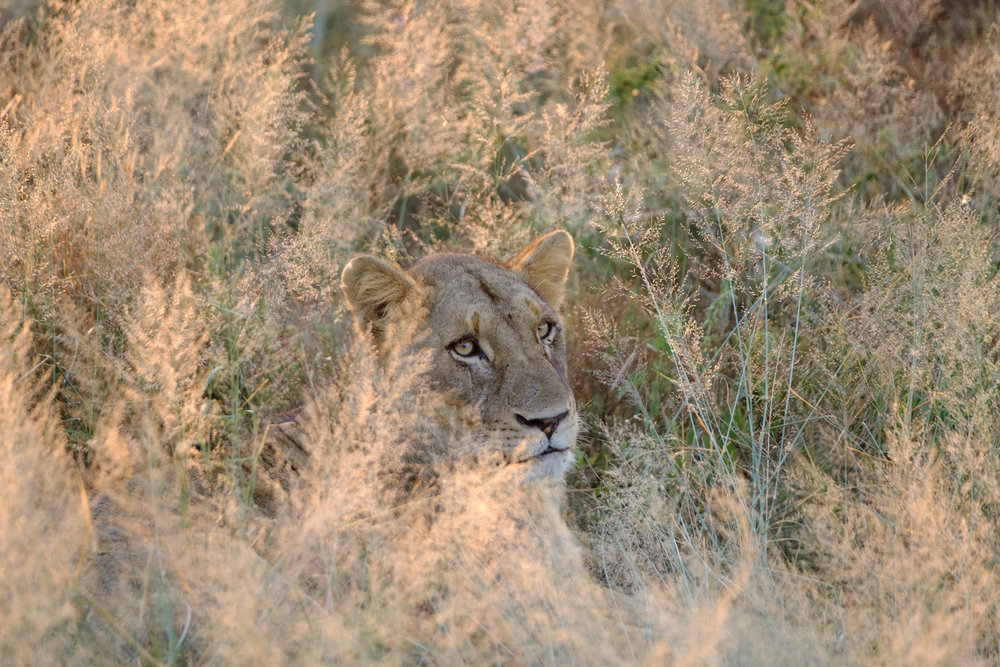
The smaller single AF point helped me ensure that the camera focused on the eye and not the bush.
- Independent retention of AF points in Portrait and Landscape orientation – Convenient when capturing still wildlife in AF-S mode with Single Point Autofocus.
- Smaller single AF points – I still think the AF points in the X-T2 need to be slightly smaller, but it’s a welcome change when shooting wildlife through the bush.
- Copyright Information in EXIF data – Seriously, it took Fujifilm this long to implement this?
- Eye Sensor + LCD Image Display view mode – This mode allows you to compose using the EVF and have the camera display the last taken image when you take it of your eyes, it beats having to use your left hand to hit the playback button on the left side of the camera.
Dust gets in your eyes
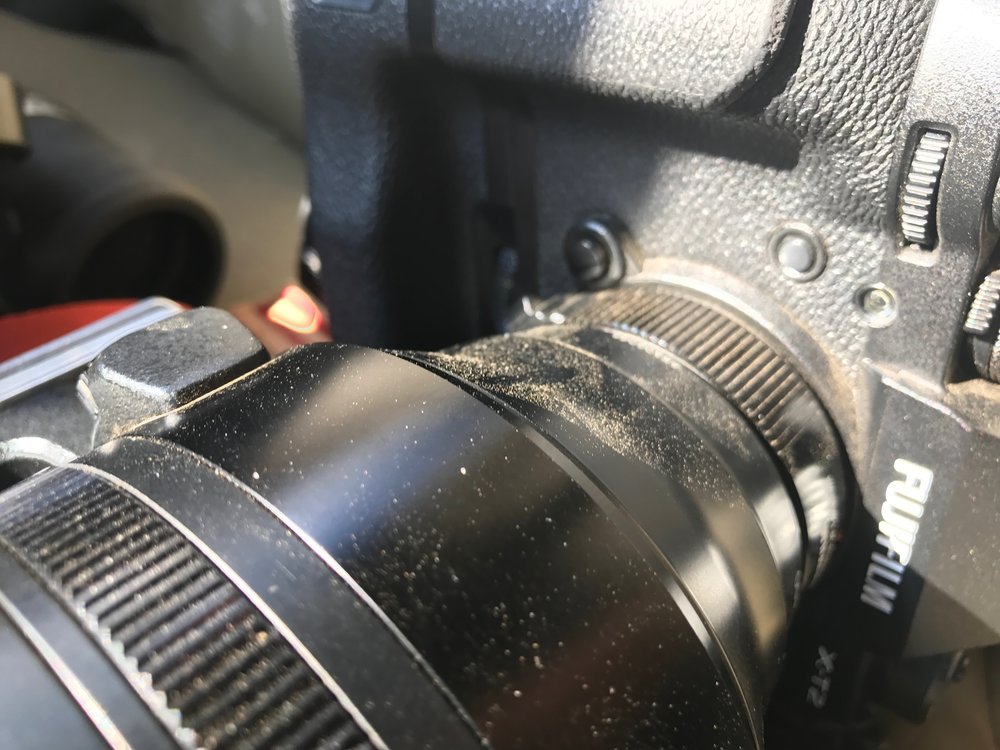
This dust is very fine
As mentioned earlier, even when seated in a comfortable open-top 4×4, one element you cannot protect enough against is dust. Even as I type this, almost 4 months after I’ve left South Africa, there is still a brown layer of fine dust trapped in the crevices of my X-T2. I emphasise the word fine as I suspect it may be the cause of my non-weather sealed X-T10 now emitting a grinding noise whenever the shutter is depressed. I completely appreciate the weather sealing that the XF 100-400mm, XF 1.4x TC and the XF 50-140mm, even though we never got wet.
Morning or Night Safari – See in Darkness (Sort Of)
One thing I’ve always found fascinating about the Fujifilm X-T2 is its ability to focus and take some web-usable pictures in extremely low light. My first experience with this was photographing the Blakiston’s Fish Own in Hokkaido, and its low-light reputation was cemented for me on this trip.
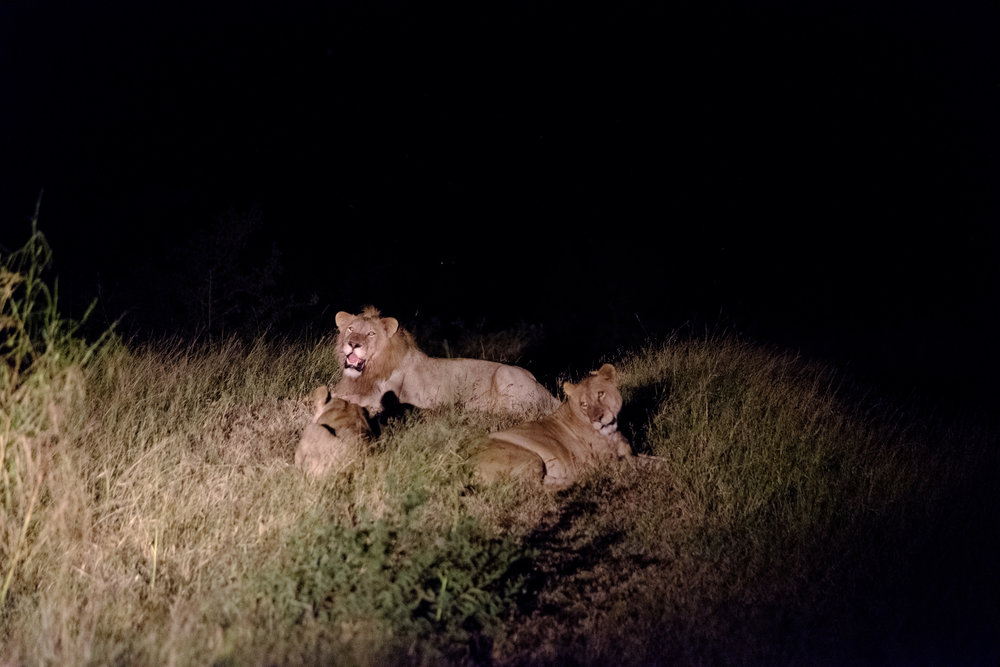
Night game drive, this was taken with a spotlight on the truck – XF 50-140mm, 1/20s, F2.8, ISO 12800
I paired one of the X-T2s I had with the XF 50-140mm, this gave me a relatively fast lens camera that I could use to capture animals seen in first light or well into the night with spotlights. There were multiple occasions where I managed to take photos of randomly spotted Hyenas or Lions where my guide using a D500 couldn’t. This can be explained due to this workflow:
- Spot random animal
- Put down the camera with the 100-400mm and pick up the other camera (1s)
- Switch ISO to 12800 using the dedicated ISO dial (0.5s)
- Bring camera to eye and use feeling to make sure it’s at F2.8 (1s)
- Fire away
Contrast this to a typical DSLR, where you’ll have to do the following
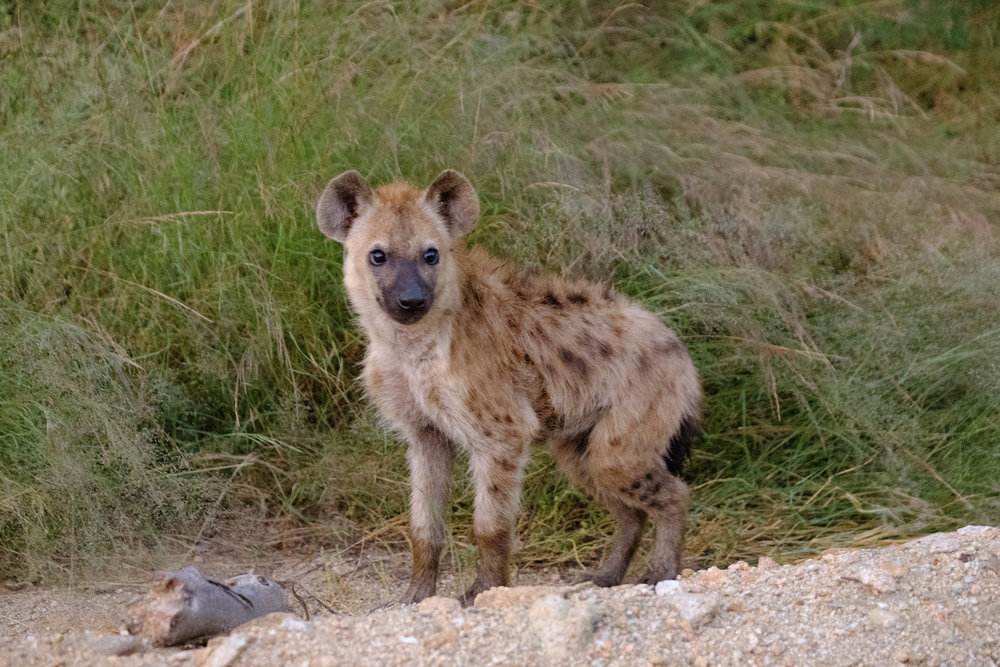
Hyena cub at first light, around 0543hrs – XF 50-140mm, 1/18s, F2.8, ISO 12800
- Spot random animal
- Change cameras (1s)
- Switch ISO to 12800 using a shortcut button and a command dial (1.5s)
- Use command dial to make sure aperture is set to F2.8 (1s)
- Bring camera to eye (1s)
- Fire away
Even after being very generous with the timings for the DSLR, the dedicated controls on the X-T2 and the tactile aperture ring on the 50-140mm lets it come out on top in almost half the time(2.5 seconds vs. 4.5 seconds). In the context of wildlife photography that matters, a lot.
Reviewing Images – Big Advantage and Huge Annoyance
I found the EVF to be a huge advantage when reviewing images when there’s bright sunlight. No more squinting at an LCD or trying to cover it with your palm in an awkward position.
Magnifying images on the X-T2 however, is downright annoying. When reviewing RAW files, the camera is unable to magnify up to 100% as it relies on displaying the smaller JPEG preview embedded in the file. I mainly shoot RAW + JPEG, with RAW saved onto Slot 1 and JPEG saved onto Slot 2.
Getting tack sharp focus on the eyes is often crucial for wildlife photography, especially during bright sunlight where heat haze is largely prevalent. On the X-T2, the playback mode defaults to Slot 1. Every. Single. Time.
What this often resulted for me were two annoyances:
- I would forget to switch to Slot 2, which involves two button presses, go about pressing < on the camera until I see an image I want to magnify, worrying that the eyes are not tack sharp, and then realising I’m still in Slot 1. Switching to Slot 2 takes you back to the last photo taken, meaning you’ll have to scroll all over again (see point 2).
- Switching to Slot 2 upfront, and then having to wait in between loads of full JPEGs before pressing the < button to go back to the previous photo. The loading time when previewing images in Slot 2 is a lot slower. This can be fixed in firmware. Fujifilm should load the smaller JPEG preview for scrolling through images, and then render a full sized preview when a user magnifies.
Are the XF 100-400mm and the XF 50-140mm Sufficient?

Smaller wildlife is where a lens longer than the XF 100-400mm will come in useful, but sometimes you get close up opportunities like this.
To wrap up, I would like to address the issue of lenses. As I mentioned in part 1, Fujifilm needs to come up with a fast telephoto, fast. My preference would be a 300mm F2.8 that can be easily paired with the XF 2x TC to form a respectable 600mm F5.6 lens. Designing a long fast lens for an APS-C sized sensor could provide a substantial weight advantage when compared to the current Canons and Nikons that have been designed for full frame sensors. The Olympus 300mm F/4 is a great example of this.

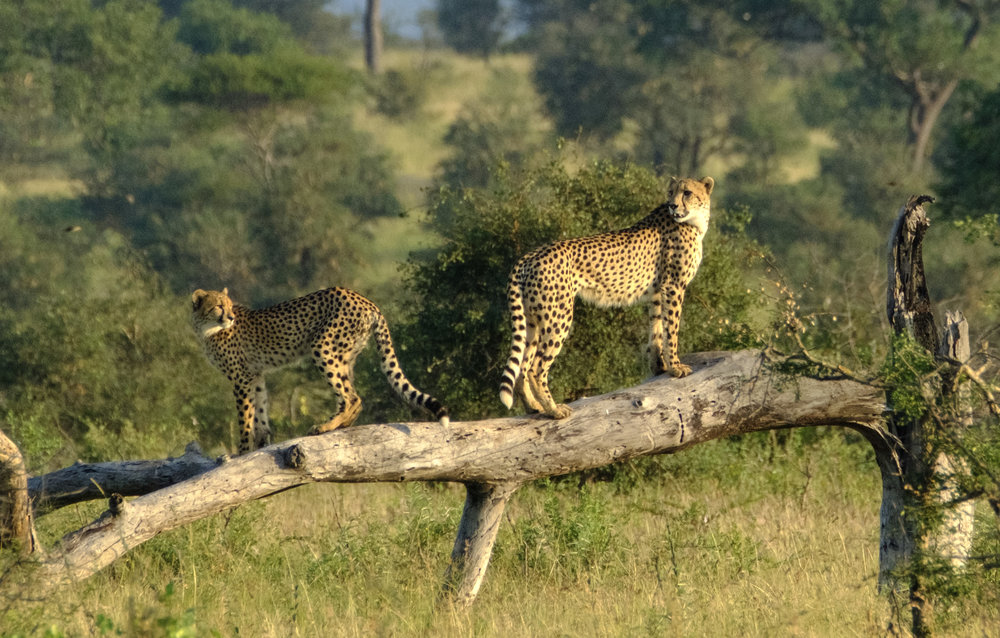
Good luck capturing this cheetah – 5m away with a 500mm lens!
As for the current cream of the crop, i would say that yes, they are more than sufficient for the enthusiast or the casual safari photographer. For the typical photo safari where one just simply sits in an open top 4×4, you can never anticipate the focal length you’ll need. A versatile set of zoom lenses is advantageous in this case. I’ve seen enough of photographers who have had a 500mm prime attached to their cameras and then missing out on shots of cheetahs spotted 5 metres away.
Another overlooked issue when it comes to focal length is heat-haze. The ground heats up about an hour or two after sunrise and generates mirages that interfere with image quality. The further your subject, the higher the volume of mirage light has to get through before it hits your sensor. I was already facing diminishing returns at 560mm in daylight, a longer lens would serve no advantage here.
Heat haze creeping in – XF 100-400mm with 1.4x TC, 560mm
For the professional who sets up his shots deliberately and waits for sunset while being half soaked in mud however, a long lens at F8 (after adding in the 1.4x TC) simply will not make the cut in low light. Fujifilm really needs to ramp up on the long telephotos to address this.
Conclusion
Despite some teething issues here and there, I found the X-T2, along with the XF 50-140mm, 100-400mm and XF 1.4x TC to be extremely competent performers for a Safari photographer. It will not replace the DSLRs paired with fast long lenses yet, but at the moment, casual enthusiasts like me can jump into the system and still produce great results while saving lots of luggage space.
I’ve actually tried using a mirrorless camera – the Olympus OM-D E-M5 II for a safari before. That camera produced a few keepers, but missed a lot more opportunities thanks to its slow AF acquisition and tracking, extremely small RAW buffer, poor high ISO performance and long blackout times. The X-T2 has none of those flaws. It simply means your chances of getting a keeper shot are higher.
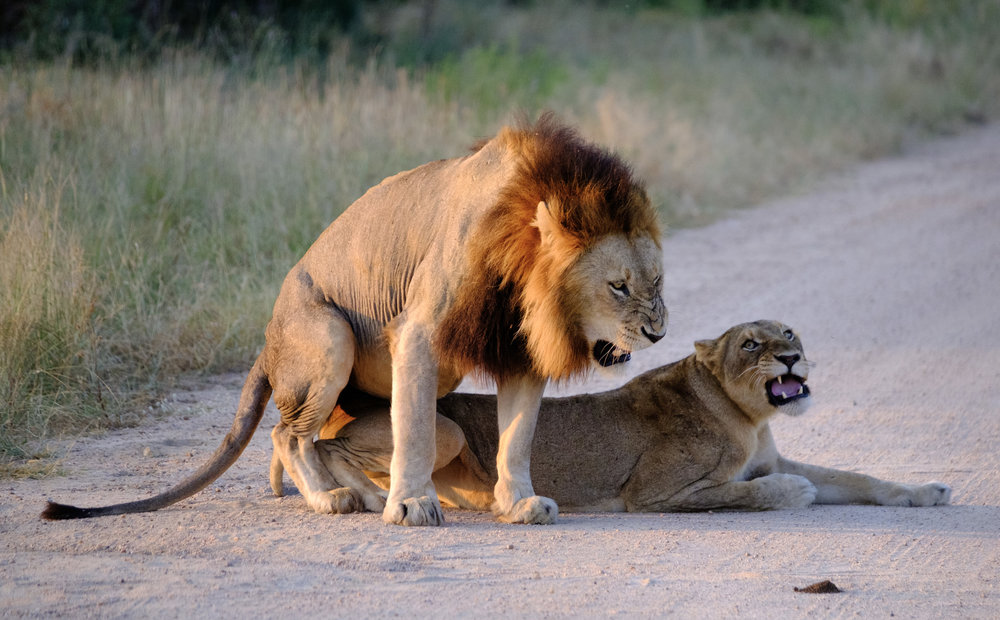
Back to mating… – XF 50-140mm, F2.8. ISO1600
It can only get better from here. The lenses will keep coming and it helps that Fujifilm releases firmware updates based on feedback regularly. I don’t remember Canon or Nikon enhancing their cameras two years after release, like what Fujifilm did with the X-T1.
For me, it’s good enough as it is. I won’t look back to DSLRs anymore.
If you’re looking to buy any of the items in the review, please support me by using my affiliate links below.
- Fujifilm X-T2 Body [Amazon US, Amazon UK]
- VPB-XT2 Vertical Power Booster Grip [Amazon US, Amazon UK]
- XF 50-140mm F2.8 R LM OIS WR Lens [Amazon US, Amazon UK]
- XF 100-400mm XF100-400mm F4.5-5.6 R LM OIS WR Lens [Amazon US, Amazon UK]
- XF1.4X TC WR Teleconverter [Amazon US, Amazon UK]
- Olympus Dot Sight EE-1 [Amazon US, Amazon UK]
This post is part of an ongoing review of the Fujifilm X-T2 and its accompanying ecosystem. They are meant to be read in order. Contents will be updated as I think of new experiences to share.
- Bird Photography
- Safari Wildlife Photography (this post)
- Travel Photography (coming soon)
- Portrait Photography (coming soon)
- Tips and Tricks (coming soon)
- Fujinon XF100-400mm Review
Featured


Wonderful article and photos. You’ve discribed my thoughts exactly. I would love a brighter telelens zoom or prime, but this combo does the job well. I guess I would love a 300f2.8 or 200-400f4 or something in that range.
One thing though. There seems a lot of radial play when the 100-400 is mounted to my xt2 ie the lens feels a bit loose. How’s your experience?
Thanks for the kind comments Robert! My 100-400mm is tight with minimal play, but the 50-140 I have has quite a bit of play. Guess it varies from copy to copy.
I have bit of play on the 100-400, but couple that with the minimal play with the TC1.4 it all seems a bit wobbly and cheapish. It doesn’t affect image quality, but could be tighter fit I guess.
Fantastic photos!
How often did you find you used the 16-55 on the XT10? Would you consider taking the 100-400 and 16-55 out for the day and leaving the 50-140 at home?
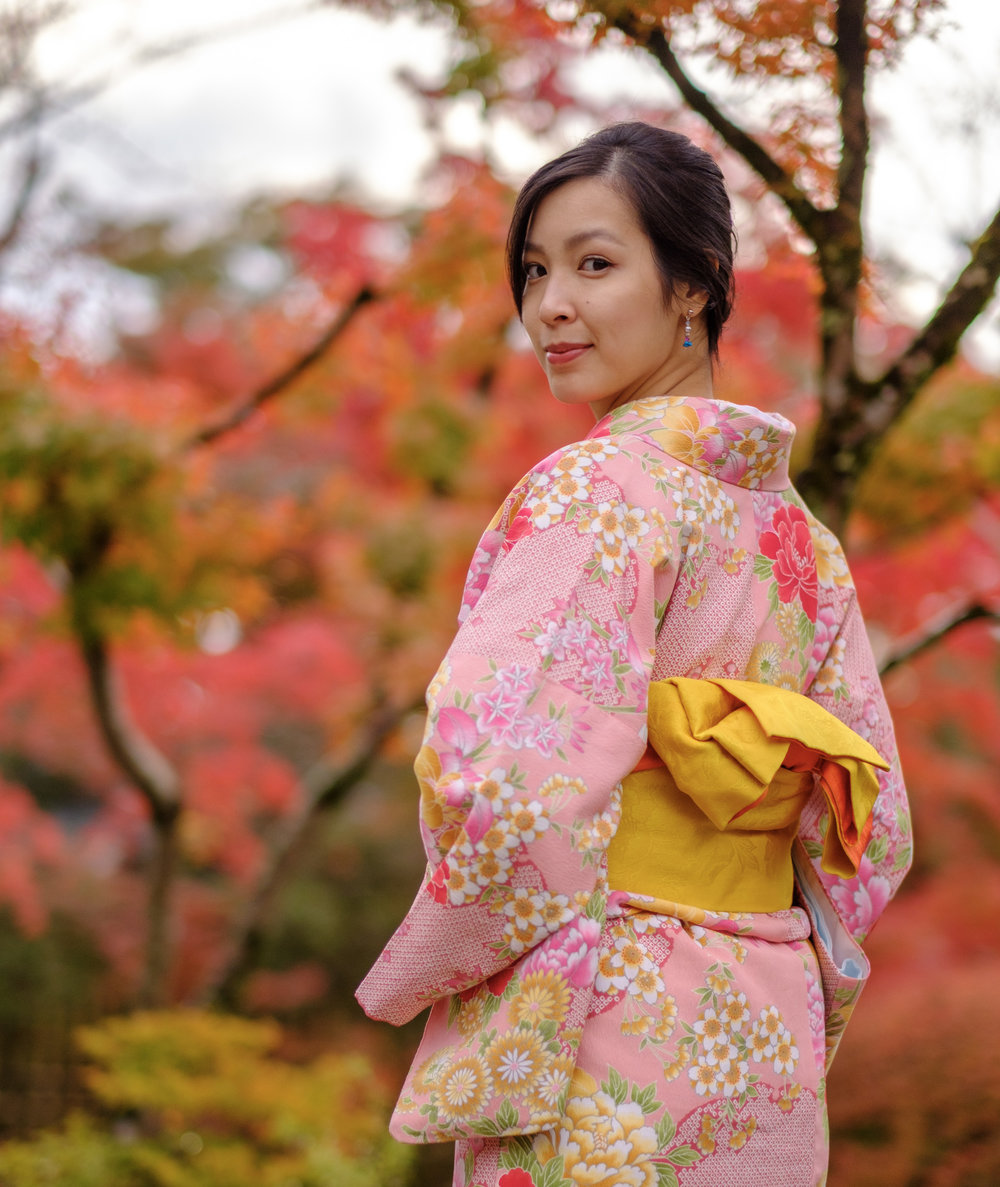
Hey Andrew, I didn’t use the 16-55mm that much for the 5 days I was in the Kruger actually. It was more for shots of my fiancée and group shots.
For a photo safari where you can haul lots of gear in the car, I wouldn’t leave any lenses at home. You can never be prepared enough!
For travel photography however, I’m still struggling to find a place for the 16-55. Not because it’s not a great lens, but because the images that come out of the 16 F1.4, 23 F1.4 and 56 F1.2 are stellar! More on this soon…
I have a Panasonic GH4 and the 100-300mm some. While it is ok in sunlight and provided some nice sharp shots of lion in Ngorongoro , focus perfornace is often poor or simply refuses to focus on birds in flight. In my spare time I travel a lot on SE Asia have been thinking of upgrading. But a move to the Panasonic 100-400 + a G80 or GH5 doesn’t look like solving the continuous fast focus, focusing in low light or limited high ISO performance limitations of MTF.
I found your very good review an eye opener as I had not considered Fuji. Perhaps Fuji is the way to go for a lightweight quality travel kit.
Thanks for the kind comment Mark. I haven’t tried a Panasonic system myself, but the laws of physics do limit the high ISO perfomance of MFT systems.
I didn’t consider Fujifilm back in 2015 as the X-T1 wasn’t capable enough, but things have changed with the X-T2 and the VPB-XT2! Also an added advantage that the 24MP sensor provides is the larger leeway when cropping.
First of all thanks a lot for your great review. I learnt quite a lot reading it!
As I am preparing for a short safari trip to South Africa myself I am wondering whether I should bring a tripod, buy a monopod or if I should be fine without it.
In addition I would be grateful, if you could tell me whether you use the zone or the wide/tracking mode.
Hi Tom,
You don’t really need a tripod for a safari per se. However if this is a rare trip to South Africa, I would suggest you bring a light tripod that can be converted into a monopod, something like the Sirui N-2204X.
There are some very stunning landscapes, particularly if you’re heading to the Kruger National Park. The tripod might come in useful then.
The monopod could be useful for keeping your telephoto lens and camera body on standby in a vehicle. Most photography focused Safari tours do provide sandbags and even gimbals, so do check with them to see if you really need one.
I mostly use the wide/tracking mode for AF, but do switch to zone or single point when there are a lot of distractions in the foreground/background. Make sure you set some function keys and get familiar with switching between modes.
Thank you so much for your fast and helpful reply, Nanda!
I’ll have a closer look at light and convertible tripods.